iTop Screen Recorder: Capturing Your Screen and Webcam with Ease
Introduction
In the digital age, screen, and webcam recording have become indispensable tools for content creators, educators, and professionals.
Are you ready to unleash your creativity and make a lasting impact through captivating screen and webcam recordings? Look no further than iTop Screen Recorder, the comprehensive and user-friendly software application that empowers content creators, educators, and professionals worldwide!
Have you ever wondered how to effortlessly capture your computer screen and share your knowledge with others? Or you’re eager to connect with your audience through engaging webcam recordings that leave a lasting impression. iTop Screen Recorder has got you covered with its powerful features and intuitive interface!
How can you make the most of its screen and webcam recording capabilities? How do you navigate the installation process and familiarize yourself with the user-friendly interface? What steps should you follow to capture high-quality screen recordings or create professional webcam videos?
Get ready as this comprehensive guide takes you on an exciting journey, unveiling the secrets of using it as a screen and webcam recorder. From basic setup to advanced editing and exporting, discover the tools and techniques to unlock your creative potential and leave a lasting impact on your audience. Let’s dive in and harness the power of iTop Screen Recorder!
Getting Started with iTop Screen Recorder
Before we dive into the intricacies of iTop Screen Recorder’s screen and webcam recording features, let’s start with the basics of getting the software up and running on your device.
Step 1: Download and Installation: Visit the iTop Screen Recorder website and download the software appropriate for your operating system. Follow the installation wizard prompts to install it on your computer.
Step 2: Launching iTop Screen Recorder: Launch the installation by double-clicking its icon on your desktop or finding it in your applications menu once the installation is complete.
Step 3: Familiarizing with the Interface: Take a moment to explore its user interface. You’ll find a well-organized layout with intuitive icons and menus for easy navigation.
Screen Recording with iTop Screen Recorder:
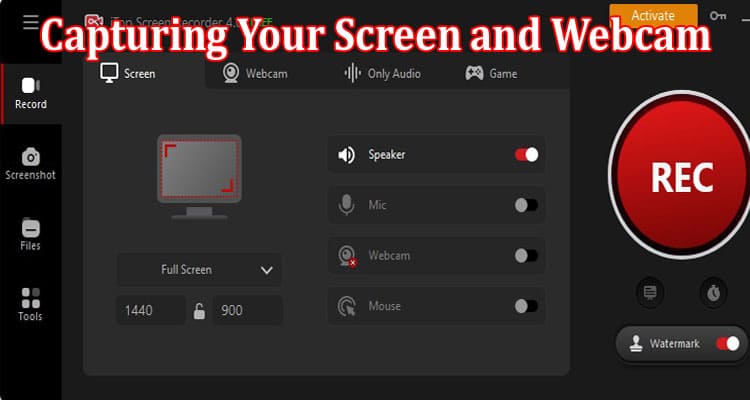
iTop Screen Recorder’s screen recording feature lets you capture and record activities on your computer screen. Here’s a step-by-step guide on how to use iTop Screen Recorder for screen recording:
Step 1:Selecting Recording Area: Click the “Screen Recording” option in iTop Screen Recorder’s main interface. A resizable frame will appear on your screen. Adjust the frame to cover the area you wish to record. Customizing the frame allows you to record the entire screen or a specific portion.
Step 2:Configuring Recording Settings: Configure the recording settings per your requirements before starting the recording. iTop Screen Recorder offers various options, such as audio recording, microphone input, frame rate, and output format. Adjust these settings based on your needs.
Step 3:Start and Stop the Recording: Once ready, click the “Start Recording” button to begin the screen recording. Perform the actions you wish to capture. To end the recording, click the “Stop Recording” button. iTop Screen Recorder will automatically save the recorded video to your designated location.
Webcam Recording with iTop Screen Recorder:
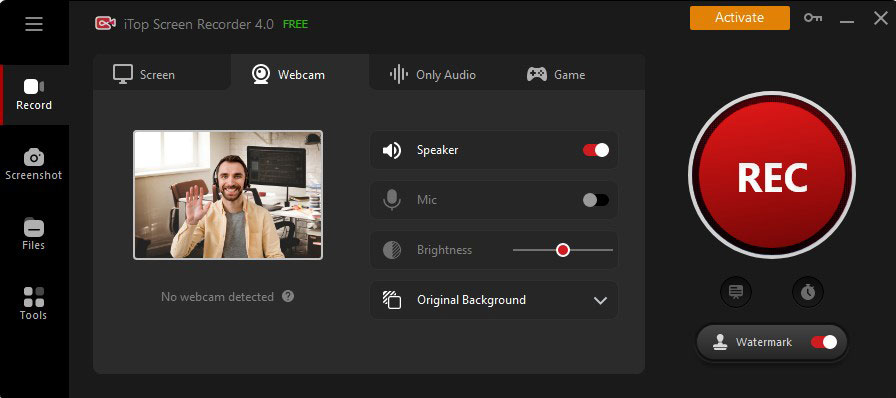
iTop Screen Recorder’s webcam recording feature lets you capture video footage using your connected or external camera. Let’s explore how to use iTop Screen Recorder for webcam recording:
Step 1:Enabling Webcam Recording: Click on the “Webcam Recording” option in iTop Screen Recorder’s main interface. A window will open, displaying a live feed from your webcam.
Step 2:Adjusting Webcam Settings: Ensure your webcam is appropriately configured before starting the recording. iTop Screen Recorder allows you to adjust resolution, brightness, and contrast settings. Make the necessary adjustments to achieve the desired video quality.
Step 3:Start and Stop the Recording: Click the “Start Recording” button to initiate the webcam recording. Perform your actions or deliver your presentation while iTop Screen Recorder captures the footage. Click the “Stop Recording” button when you’re finished. iTop Screen Recorder will save the recorded video in the designated location.
Editing and Exporting:
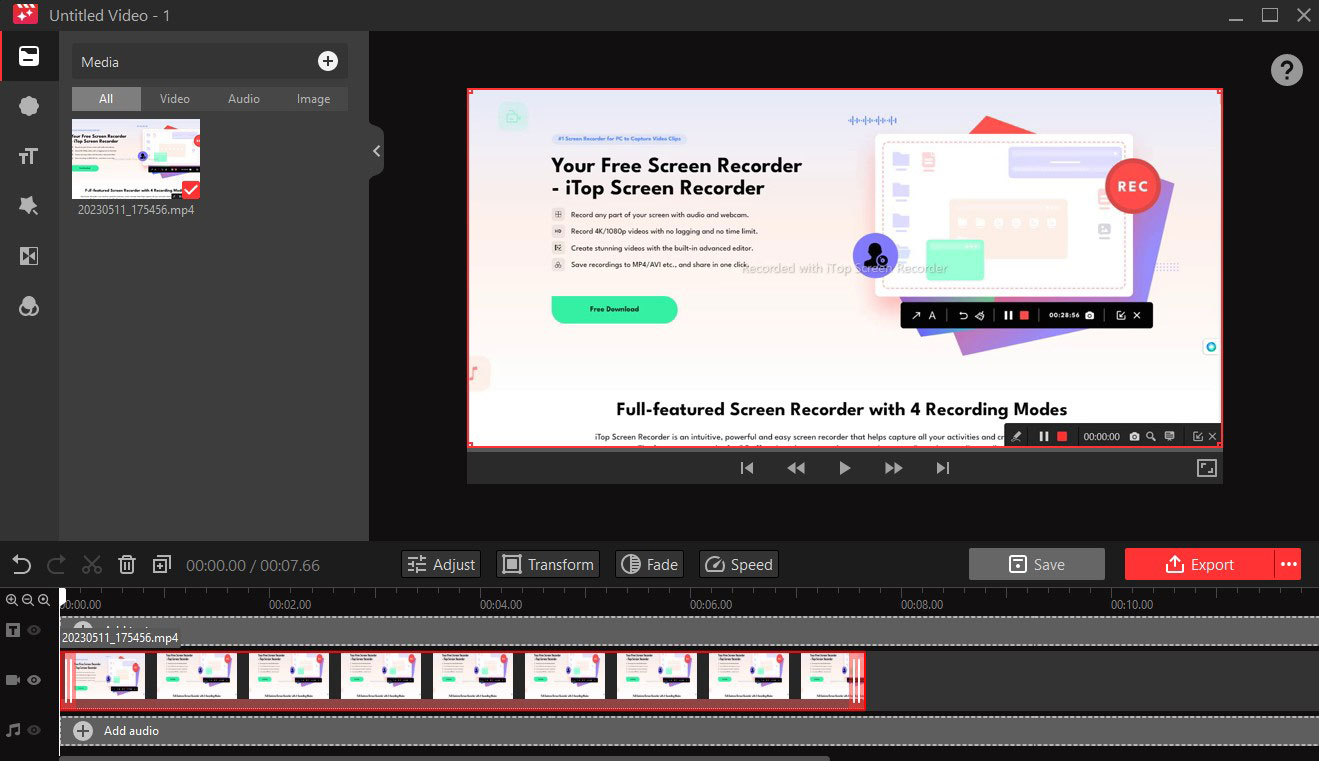
iTop Screen Recorder also provides basic editing capabilities, allowing you to refine your recorded videos before sharing them with others. After you’ve completed the screen or webcam recording, follow these steps:
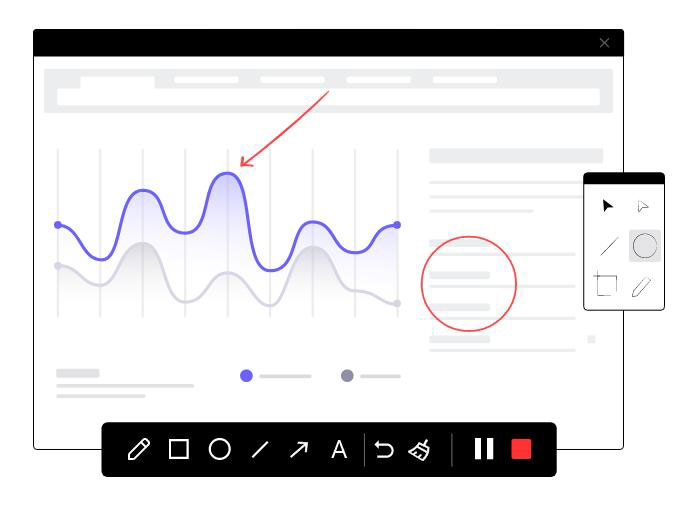
Step 1:Editing the Recorded Video: Click the “Edit” button in iTop Screen Recorder’s main interface. You can trim, cut, merge, add captions, apply effects, and perform other edits to enhance your videos.
Step 2:Exporting the Video: Once you’re satisfied with the edits.
Conclusion:
iTop Screen Recorder is a powerful and user-friendly software application that enables content creators, educators, and professionals to capture and share their screen and webcam recordings easily. Following the steps outlined in this comprehensive guide, you can unleash your creativity and take full advantage of its features. Creating instructional videos, recording presentations, or engaging in video conferences provides the tools necessary to produce high-quality content. Its intuitive interface, flexible recording options, and basic editing capabilities offer a seamless experience for capturing and refining your recordings. Embrace it as your go-to screen and webcam recorder to elevate your productivity and captivate your audience.